#
Fast, relevant and powerful search experience for your website or custom application — without the learning curve. Sell more and get the right answers to more people on your platform.
## Prerequisites
- Preexisting [website](https://cms.solodev.net/workspace/websites/).
## Installation
1. Go to **Swiftype** and login to your account. If you don't have one, [create a new account](https://app.swiftype.com/signup).
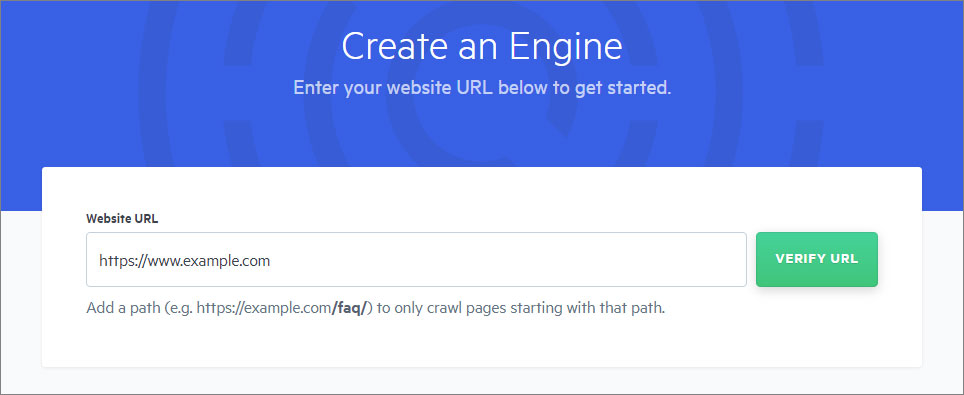
2. Click **Create Engine**.
3. Add your website URL or a path.
4. Click **Verify URL**.
5. Name your **Engine** something descriptive and select a **Language**.
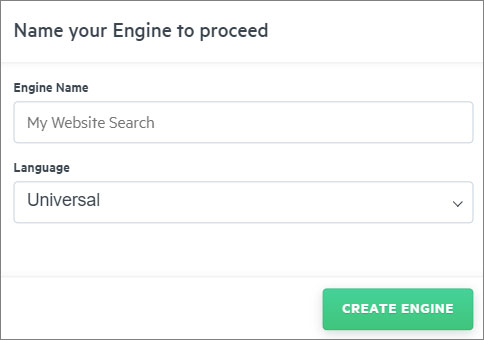
6. Click **Create Engine**.
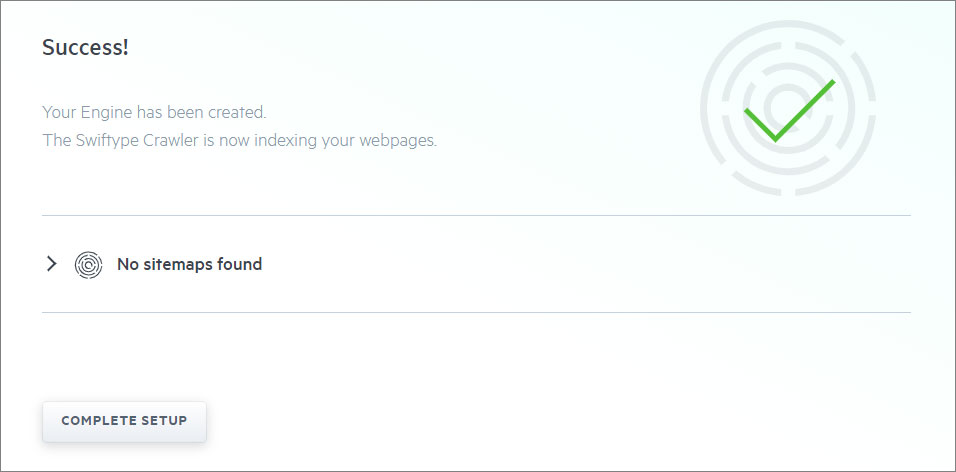
7. Click **Complete Setup**.
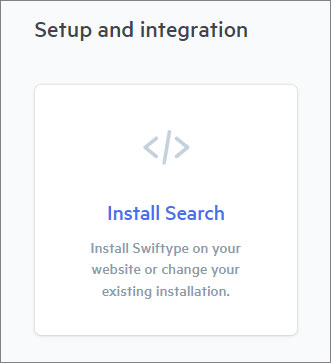
8. Look for **Setup and integration** at the bottom of the page and click on **Install Search**.
{% tabs %}
{% tab title="Manual" %}
1. Copy the code snippet provided.
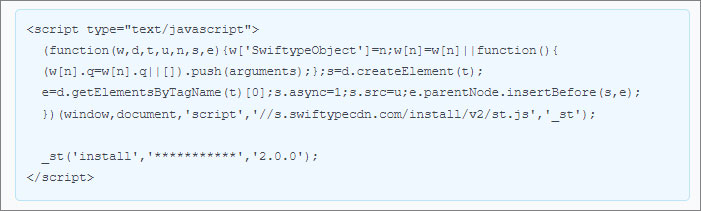
2. Paste the code between the `` HTML tags on every page of your website that you would like Swiftype's embedded options to appear.
{% endtab %}
{% tab title="Tag Manager" %}
1. Copy the code snippet provided.
2. Go to **Google Tag Manager** and log in.
3. Select the container for the website where you want to add Swiftype.
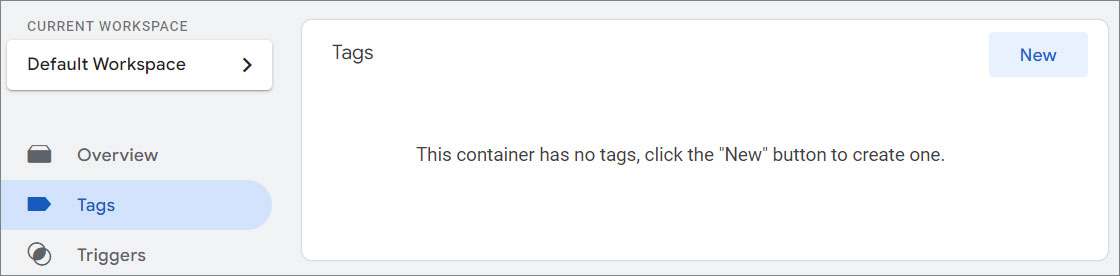
4. Click on **"Tags"** in the left sidebar.
5. Then, click the **New** button to create a new tag.
6. Name your tag something descriptive, like **"Swiftype Search Integration"**.
7. Choose **Tag Configuration** and select **Custom HTML**.
8. Paste the Swiftype snippet.
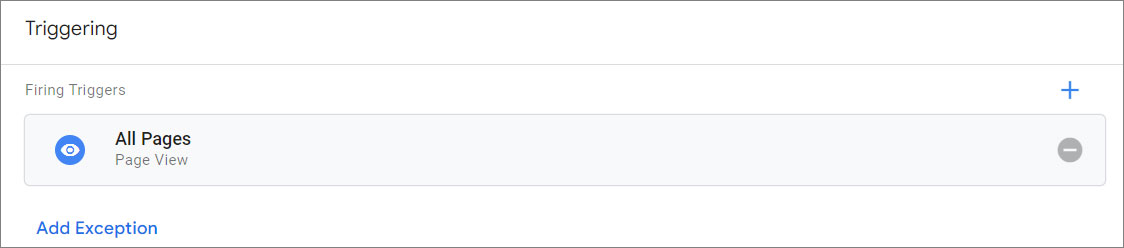
9. Click on **"Triggering"**. Select **All Pages** if you want the search script to be available on every page of your website.
!!!Note:
Alternatively, you can choose a specific trigger, like only firing on a particular page (e.g., a search results page).
!!!
10. Click **Save**.
11. Use the [**"Preview"** mode](https://support.google.com/tagmanager/answer/6107056) in Google Tag Manager to check if the tags are firing correctly, or use the Google Tag Assistant extension in your browser to verify the installation.

12. Click **Publish**.
{% endtab %}
{% endtabs %}
9. Go to the HTML where you have your search form.
10. On the input field, add the following class: `st-default-search-input`.
```js
```