#
reCAPTCHA uses advanced algorithms and behavioral analysis to distinguish between humans and bots, enhancing online security. It offers different verification methods, including image challenges and invisible detection, to create a smoother user experience while keeping automated attacks at bay.
## Prerequisites
- Preexisting [website](https://cms.solodev.net/workspace/websites/).
- Preexisting [Google Account](https://accounts.google.com/).
## Billing Information
Before installing reCAPTCHA, you will need a Google Account to set up your billing information.
1. Go to the [Google Cloud Console](https://console.cloud.google.com/). If you don't have a Google Account, [create a new account](https://accounts.google.com/signup).
2. Log in with the Google account associated with your reCAPTCHA project.
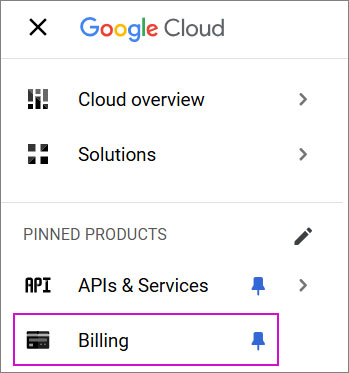
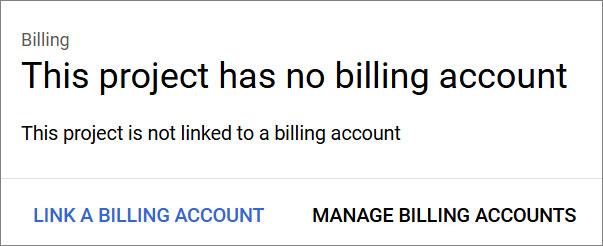
3. From the navigation menu, go to **Billing**.
4. Link an existing **Billing Account** or create a new one by clicking **Manage Billing Accounts**.
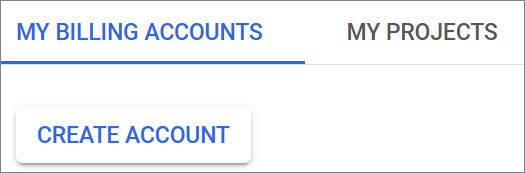
### Manage Billing Accounts
1. Select **Create Account**.
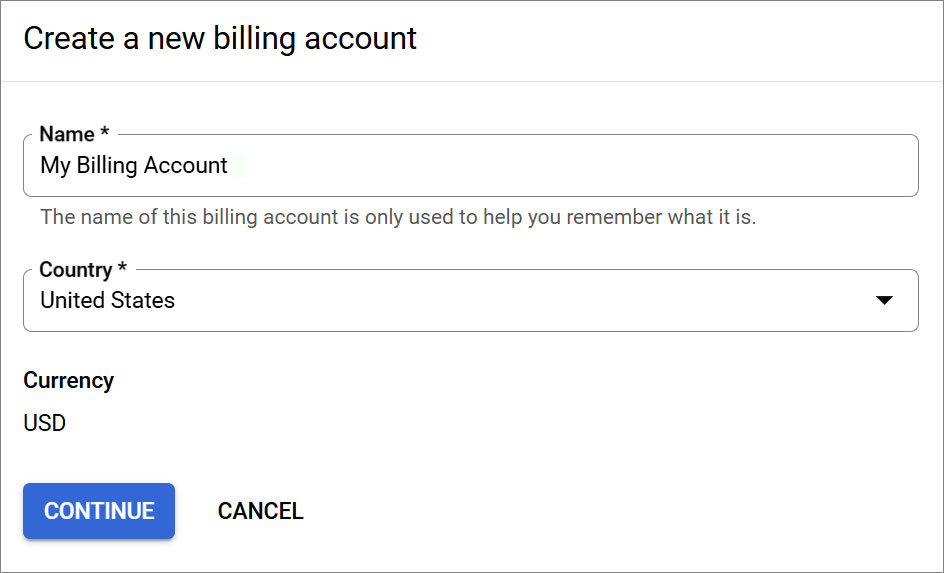
2. Name your billing account and select your country and click **Agree & Continue**.
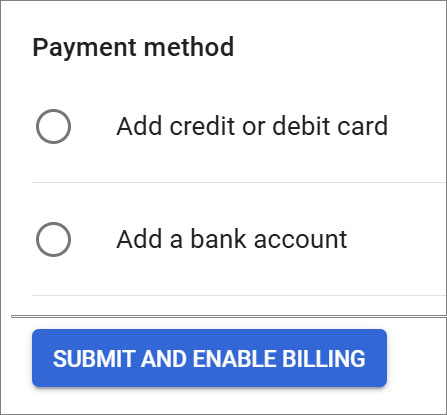
6. Select your payment method and add your credit card or bank account details. Once completed, click **Submit and Enable Billing**.
## Installation
1. Go to **reCAPTCHA** and login to your account.
2. Click the plus icon to **Create** a new project.

3. Enter a label for your project.
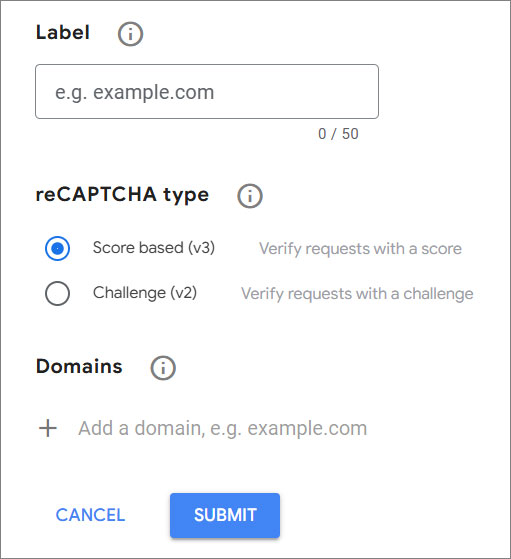
4. Select **"Score Based (v3)"** as the reCAPTCHA type.
5. Add your domain under **"Domain"**.
6. Click **Submit**.
!!!Note:
If you are working with a third party to help set up your reCAPTCHA, you will need to obtain an admin email address from the vendor or developer, and add it as an “Owner” to your reCAPTCHA under Domain Settings. Example: **@solodev.com.
!!!
### Site and Secret Keys
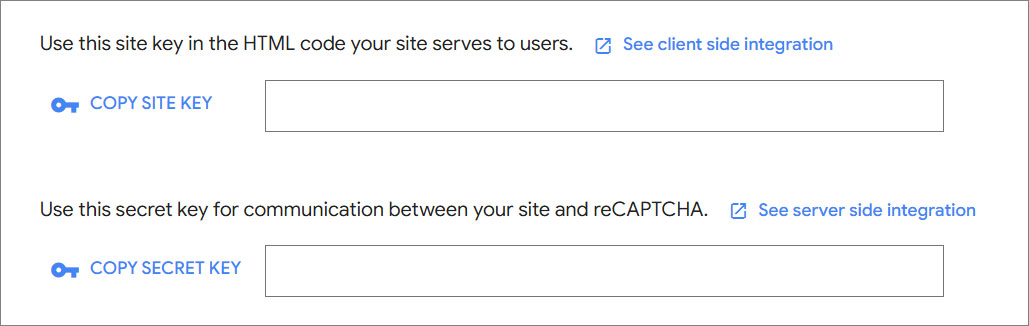
1. On the next screen, copy and save the **Site Key** and **Secret Key** for future use.
### Setup on CMS
{% tabs %}
{% tab title="CMS Settings" %}
1. Log in to **Solodev CMS**.
 2. From the left navigation, go to **Settings** and then **Config**.
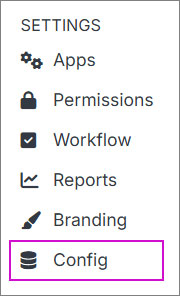 3. Open the **Google** Accordion.
 4. Paste the **Site** and **Secret Keys** you previously received.
5. Click **Submit**.
{% endtab %}
{% tab title="CMS Form" %}
To enable reCAPTCHA on your form:
1. Go to the form you want to enable reCAPTCHA.
2. Click **Modify** on the actions bar.
4. Paste the **Site** and **Secret Keys** you previously received.
5. Click **Submit**.
{% endtab %}
{% tab title="CMS Form" %}
To enable reCAPTCHA on your form:
1. Go to the form you want to enable reCAPTCHA.
2. Click **Modify** on the actions bar.
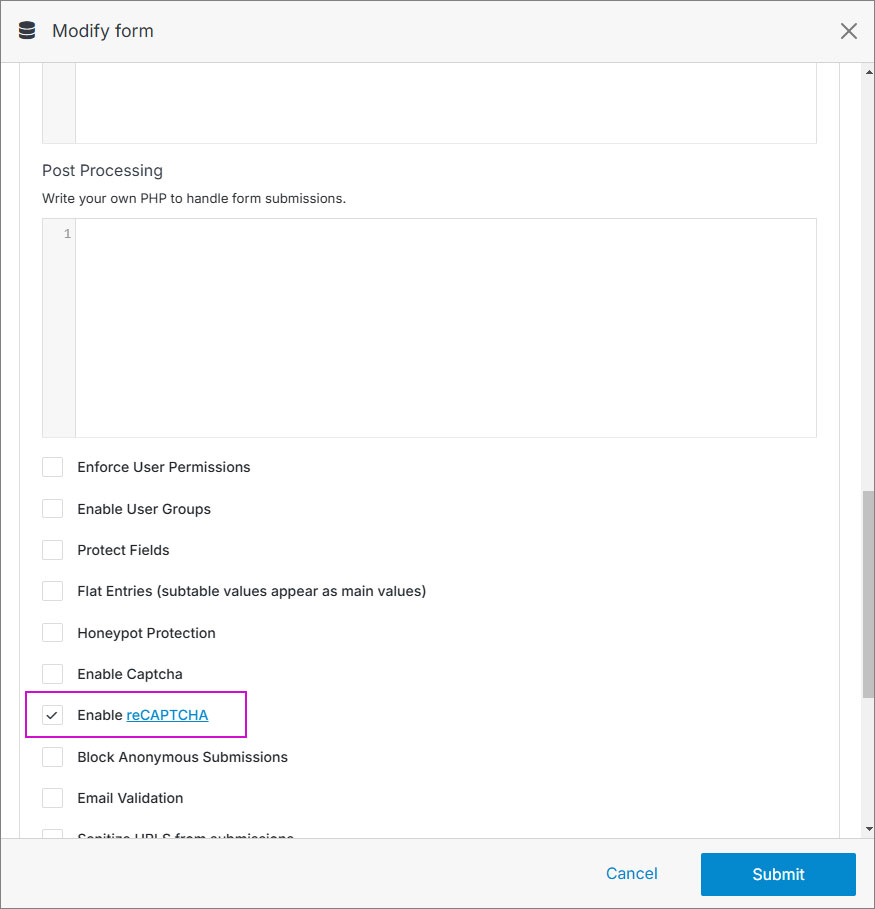
 3. On the Modify modal, open the Advanced Accordion.
4. Click the **"Enable reCAPTCHA"** checkbox.
3. On the Modify modal, open the Advanced Accordion.
4. Click the **"Enable reCAPTCHA"** checkbox.
 5. Click **Submit**.
6. Go to your form code and add the following shortcode:
```js
[recaptcha id="1"]
```
!!!Note:
Update the ID number with your ID form.
!!!
{% endtab %}
{% endtabs %}
5. Click **Submit**.
6. Go to your form code and add the following shortcode:
```js
[recaptcha id="1"]
```
!!!Note:
Update the ID number with your ID form.
!!!
{% endtab %}
{% endtabs %}